
When we replaced all the house batteries and slightly modified the battery compartment on our boat, we decided to install a remote battery switch. The remote switch replaces the familiar big red & black rotary switch found near the battery compartment on almost all boats. It is essentially a very powerful “relay” that can be operated by way of a much smaller switch located in a more convenient place on the boat. Since the relay does not have to be physically accessed to operate, it can be mounted inside the battery compartment along with the batteries using very short cable runs. It has worked great for several years now, but left us with a small cosmetic puzzle to solve.
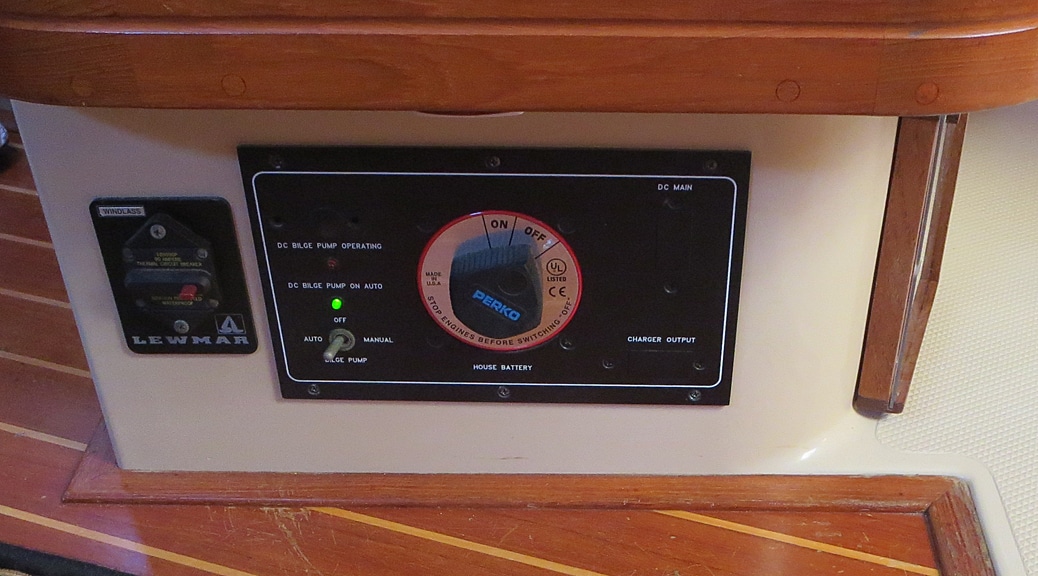
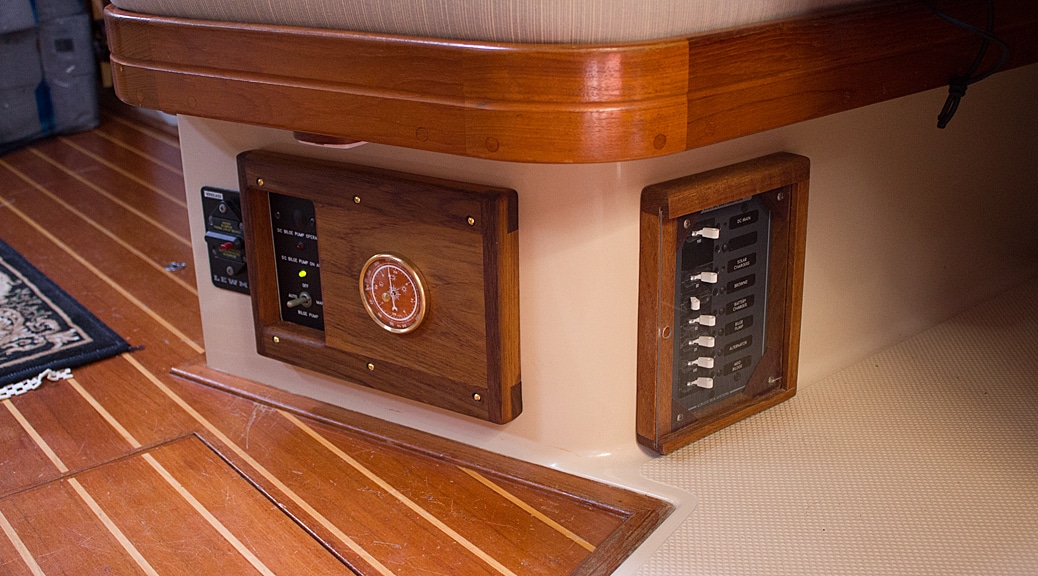
With the old switch now inoperative and no wires going to it, we wanted to remove it so as not to confuse any mechanics or crew who wouldn’t be familiar with our modification. However, simply removing the old switch left a big gaping hole in the panel on which it was mounted, with some high current wires visible just behind the panel.
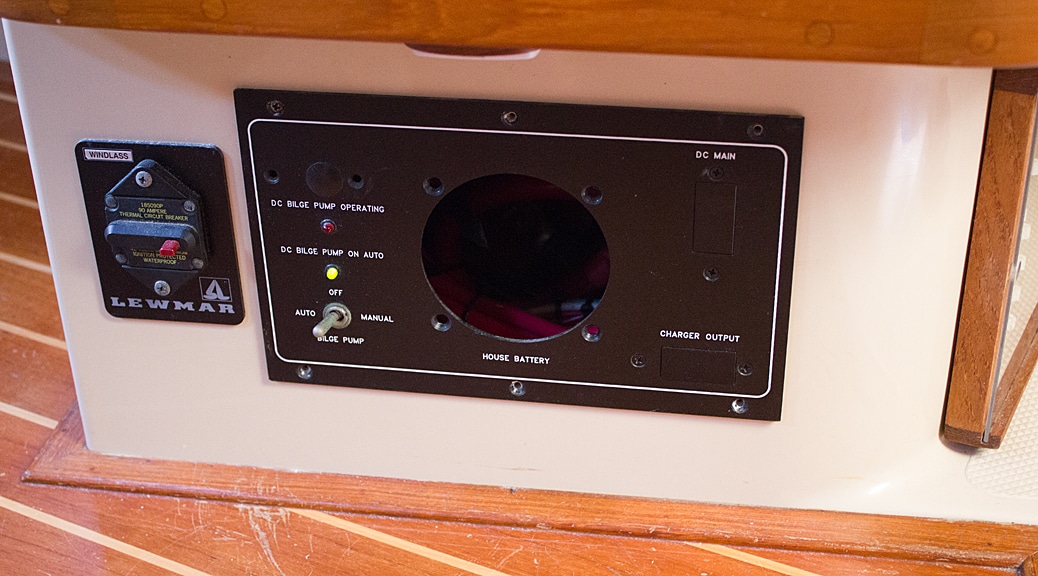
We thought about removing the entire panel and replacing it with something decorative, but the bilge pump switch, light, and labels were mounted very neatly on the left side of the panel and we didn’t want to disturb them if we didn’t have to.
We turned to Paula’s Dad, who has provided a number of clever decorative solutions on the boat for problems just like this. After providing him some careful measurements, he designed a beautiful wood overlay that covers the entire panel, but has a cut out for the bilge pump switch & lights. The overlay is also routed out 1/8th of an inch on its reverse side so that the original metal panel (which will remain in place) will be inset in the back of the overlay piece. That allows the edges of the wood overlay to be flush with the surrounding fiberglass surface.
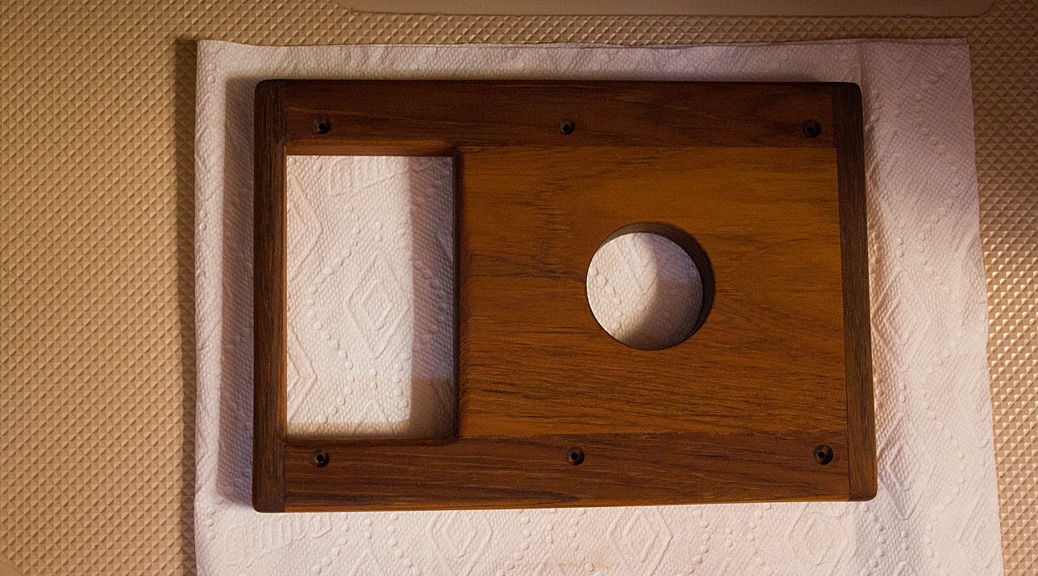
To add some nautical flavor and additional functionality, he cut a round hole out of the center of the overlay so that a small but elegant barometer could be mounted flush on the surface of the panel.
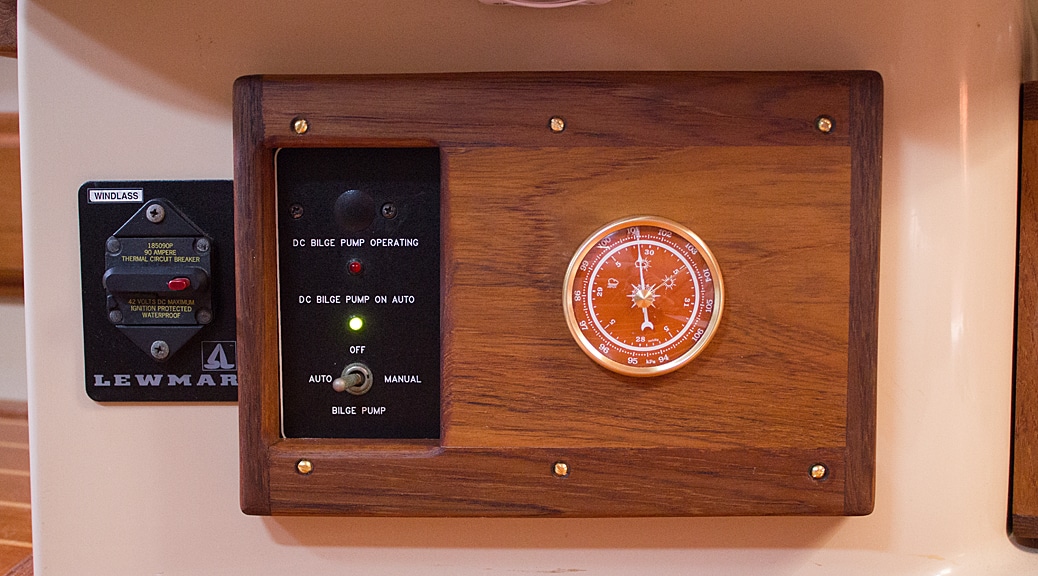
It looks great and, as it happens, is located right next to another of his creations – a frame and protective cover for an additional breaker panel.
2 Responses
You didn’t give credit to the finishing dept.
You are correct. Allow me to “right the ship” – The absolutely gorgeous oil finish, applied painstakingly by hand using 7 coats of tung oil with careful but lovingly administered wet-sanding between each coat, was brilliantly and professionally completed by Paula.