
Here is how I installed the Filter Boss “Commander” Fuel Polishing system from KTI Systems, Inc. in an IP420. The first decision was to evaluate mounting locations in the IP420 engine compartment and then choose which version of the Commander series would best suit the available space. I chose the 60GPH version, the smallest. You can buy it pre-assembled in a “horizontal” version (components pre-mounted on a board to optimize vertical clearance) or a “vertical” version (components pre-mounted to optimize horizontal clearance). You can also buy it as a “modular” system which gives more mounting options for tight spaces. While it would have been nice to be able to use one of the two completely pre-built assemblies, neither of them would fit in any area of the engine compartment and still allow easy access for filter changes and clearance for hose runs. Therefore I opted for the modular version. The folks from KTI Systems at the Annapolis Boat show were very helpful and worked with me in regard to the available space in the IP420 engine room (I had measurements with me). They offered to make a customized mounting with the Commander unit and the fuel pump mounted horizontally on a plastic board and pre-plumbed. The filters themselves were left separate. This was the most optimal way to go as you will see in the pictures below.
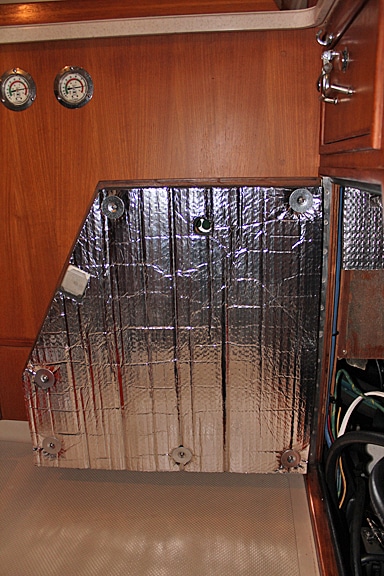
I started by removing the previous pump and single filter setup that came with the boat. The sound proofing material on the door had seen better days, so I removed that as well and replaced it with a new piece.
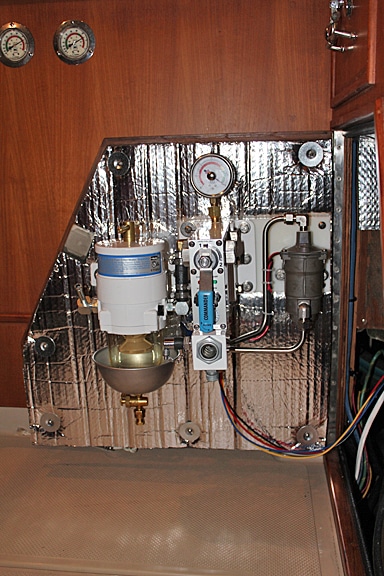
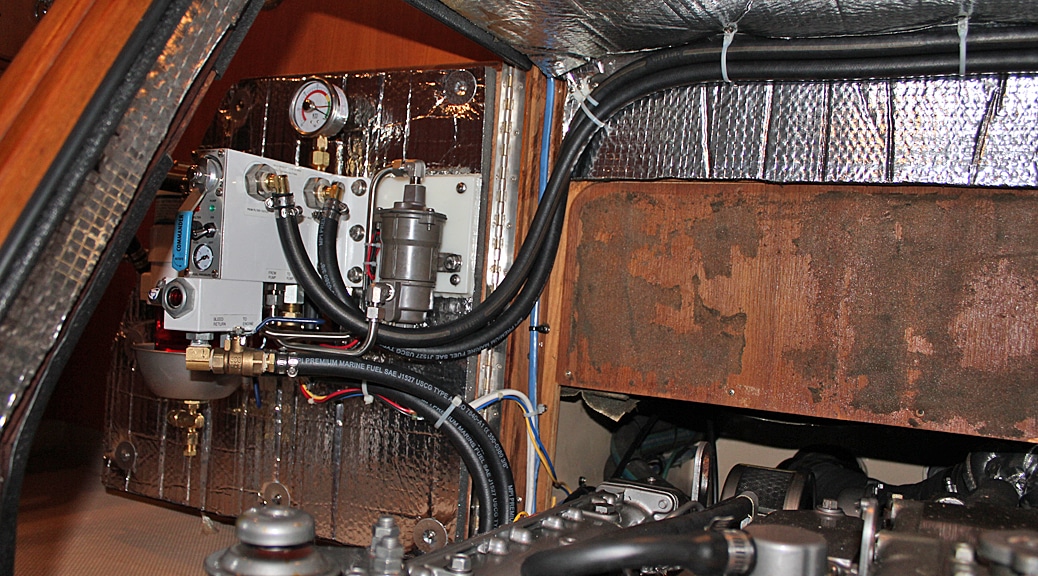
After “dry-fitting” all the components in several possible places, I decided to mount the custom Commander/pump assembly on the inside of the starboard door to the engine compartment (the galley side in the IP420). I mounted it as far as possible to the upper right side of the door. This way, I had room to mount one of the two Racor filters to the left of the assembly, and would have a good amount of clearance between the bottom of the assembly and top of the engine when the door was closed. This also was the best spot for the subsequent hose runs to the Commander unit. Another decision at this point was what size fuel hose to buy. The boat already had 1/4” fuel lines coming to/from the tank to the previous Racor and then connecting to the engine. All the fuel ports on the Commander are natively 3/8”. I choose to replace all the fuel hose with 3/8’’, except for the hose that supplies the engine itself. This way, I can get a lot more flow when polishing the fuel since the whole route to/from the tank and through the all the Racor and Commander fittings is 3/8”.

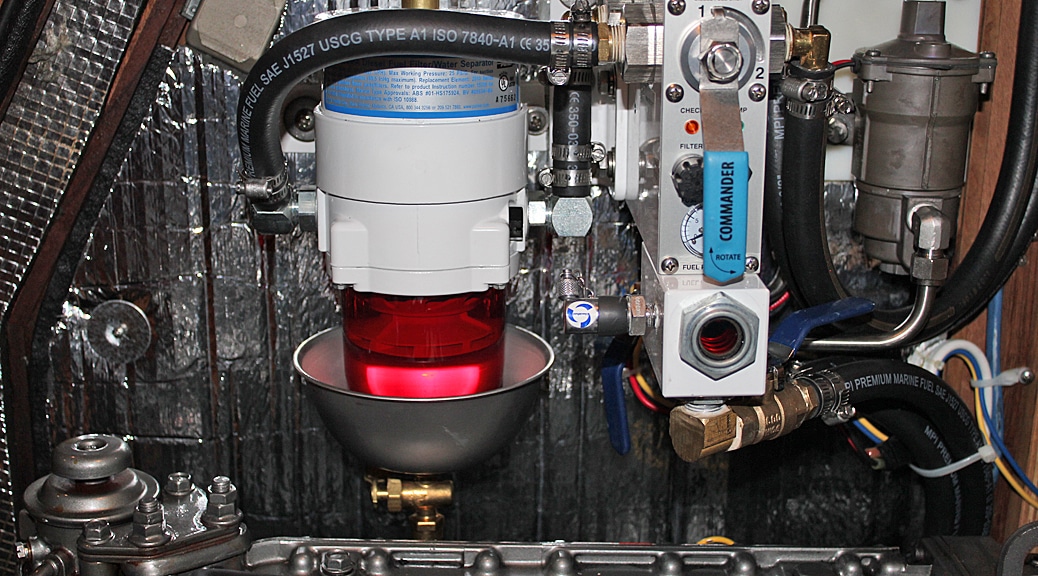
Next, I mounted one of the two Racor filters to the left of the assembly on the door. The mounting position of the filter was carefully chosen so: 1) The filter wouldn’t hit the edge of the door frame when closing the door, 2) It wouldn’t hit or be too close to anything on the engine when the door was fully closed, 3) There wouldn’t be impossible bends in the short hose run between the filter inlet and the Commander outlet ports. Fortunately, there was just barely enough room to satisfy all these criteria.
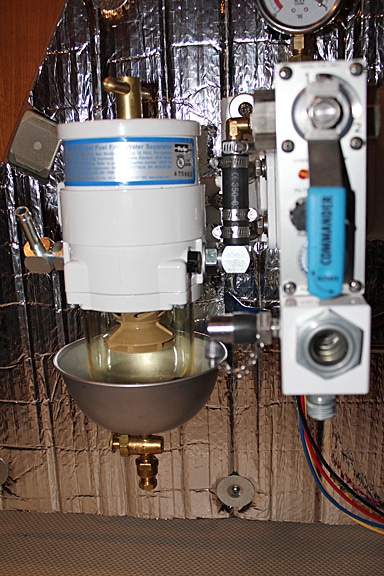
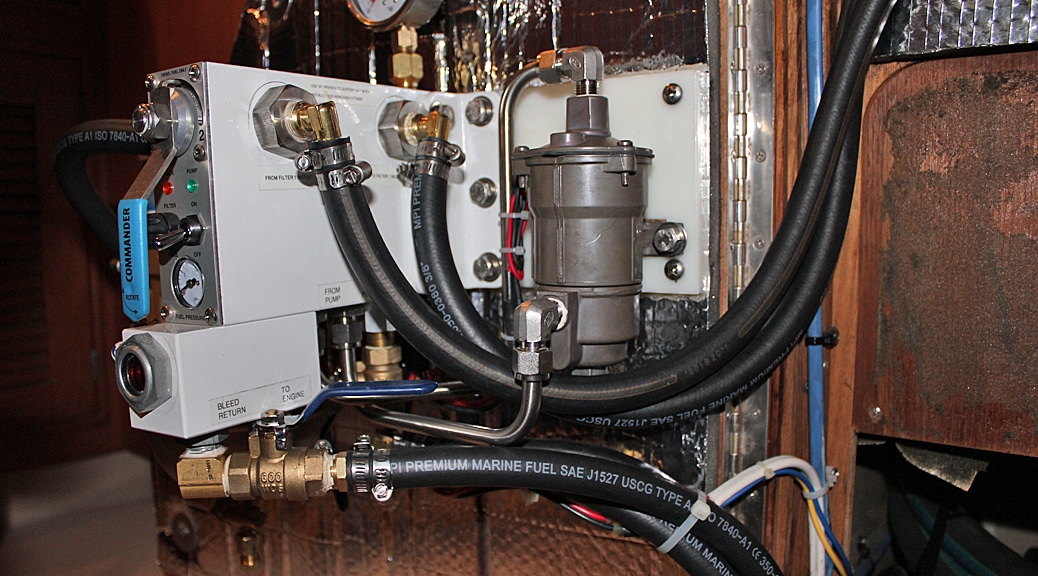
If you look at the close-up picture, you can see it was possible to mount the filter close enough to the commander to get a perfectly straight short hose run from the Commander outlet to the filter inlet. To get these two components this close together, it was necessary to cut off part of the metal mounting “ear” on the Racor which was butting up against the Commanders mounting plate and preventing the nice straight hose run. I did have to buy several 90 degree fittings for the Racor ports as well as the Commander ports.
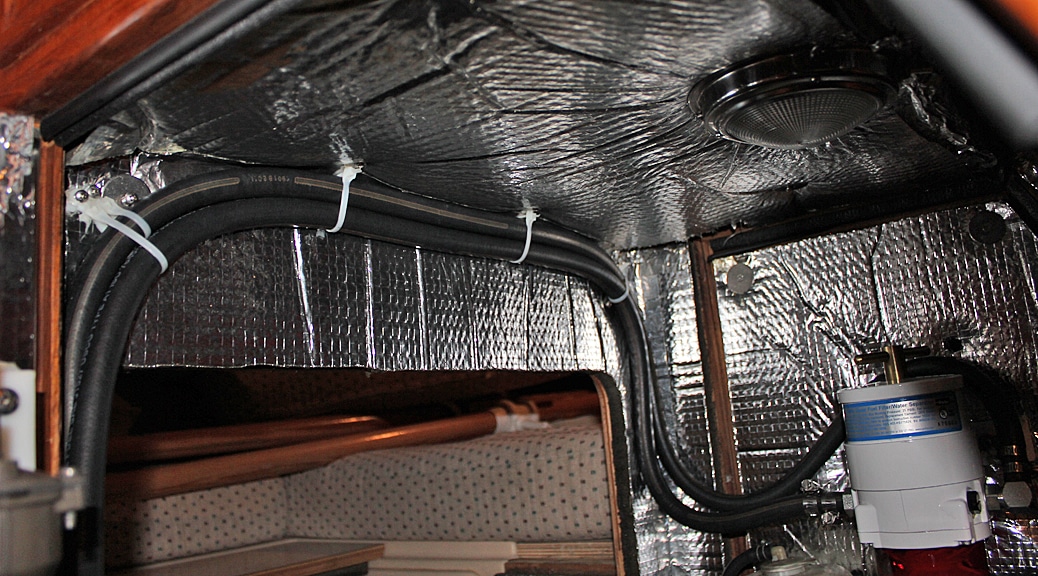
The only other reasonable place to put the 2nd Racor was on the inside of the other access door on the port side of the engine. Of course, mounting it there meant I had to route the fuel lines across the engine. Rather than go under or around the front of the engine, the shortest path was up and over.
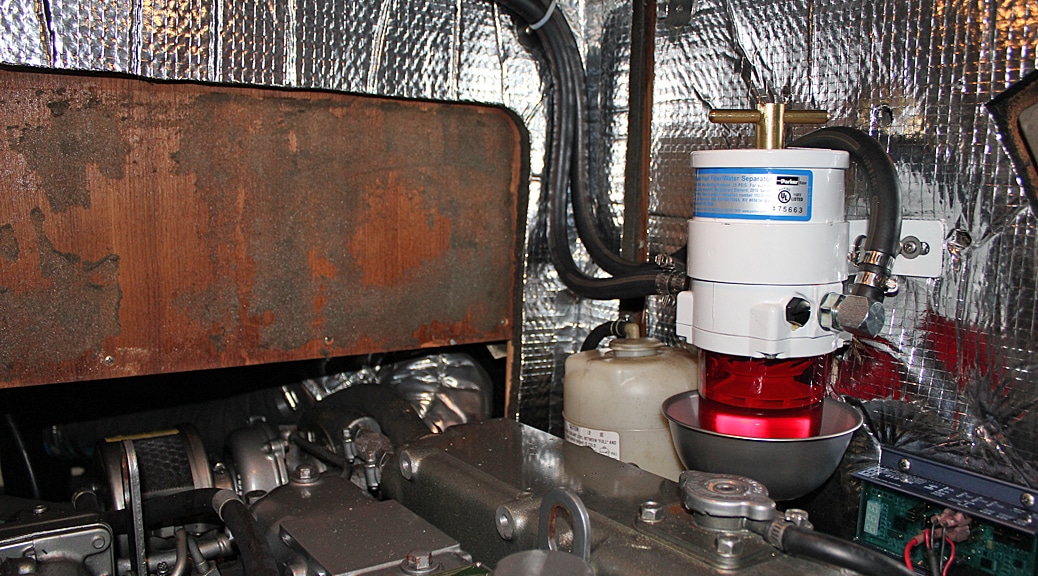
This hose routing also made it easier open both access doors fully without the need for a lot of slack fuel line near the door hinges. Note the section of the back wall of the engine compartment with the sound proofing removed. While this area appears to be a potential mounting spot for the Commander assembly itself, that part of the back wall is actually a removable panel on the IP420 (aft side engine access), preventing anything from being mounted on it.

Everything worked just fine and I had no leaks. I did have to fill the distant Racor with diesel first as the pump could not self prime it like it was able to do for the closer Racor.