When we took possession of our boat, it was equipped with two manual toilets with which you pumped the waste into either an on-board holding tank, which periodically had to be pumped out, or overboard. The overboard option for untreated sewage is only legal if you are far enough offshore (3 miles). Both toilets functioned well enough, but much like on our previous boat a smell develops from them if the boat is closed up and left unattended for any period of time longer than a few days. We had done several experiments on our previous boat to try and determine the sources of the smells (it’s not always what you think!) and also did a lot of reading. As you might imagine, there is no shortage of experts on this topic, a sweet smelling boat being a main ingredient of “comfort” while living aboard. The best resource I found online were the writings of Peggy “The Head Mistress”. She adds her commentary to many of the boating Q&A forums we read and is by far the most experienced and logical thinker on this subject. Armed with Peggy’s advice and our own personal experiences with our previous boat, we devised a plan that included four key elements:
Replace all the existing sanitation hoses – while our boat came with reasonably good quality hoses, they were more than ten years old when we started this project and had become one component of the smell problem. In the time since our boat was built there have been several new hose products that have come on the market employing more advanced technology to eliminate odor permeation. The best of these hoses are not cheap and it is tempting to cut costs here. Don’t. As we later found out, you do get what you pay for. We went with the Shields PolyX hose and are very happy we did. Not only have they remained odor free, they are more flexible than traditional wastewater hose which eased the installation a lot.
Re-plumb the toilets to use fresh water, versus sea water, for flushing – this is a controversial subject in many of the boating forums, not because it isn’t an effective odor eliminator, but because some view it as a waste of fresh water. The decision of whether or not to take this step is dependent on a number of variables including available water tankage, time spent at the dock verses on the hook or underway, ability to make water, and tolerance for a small bit of odor always being present. On our previous boat we noticed that when arriving at the boat on a Friday afternoon, after it was closed up all week, there was an obvious smell coming from the toilet. After flushing it a few times the smell mostly went away. The source of this smell, confirmed by Peggy, was actually organisms in the sea water sitting in the hoses and the bottom of the toilet all week, not anything to do with sewage. While there are some mitigations that can be employed to combat this, using fresh water for flushing (just like in a home toilet) instead of seawater absolutely eliminates this source of smell. Given our intended cruising plans and lifestyle while living aboard, plus the fact that we have a large fresh water tank and are now pre-plumbed and pre-wired for a water maker, we were able to rationalize this decision.
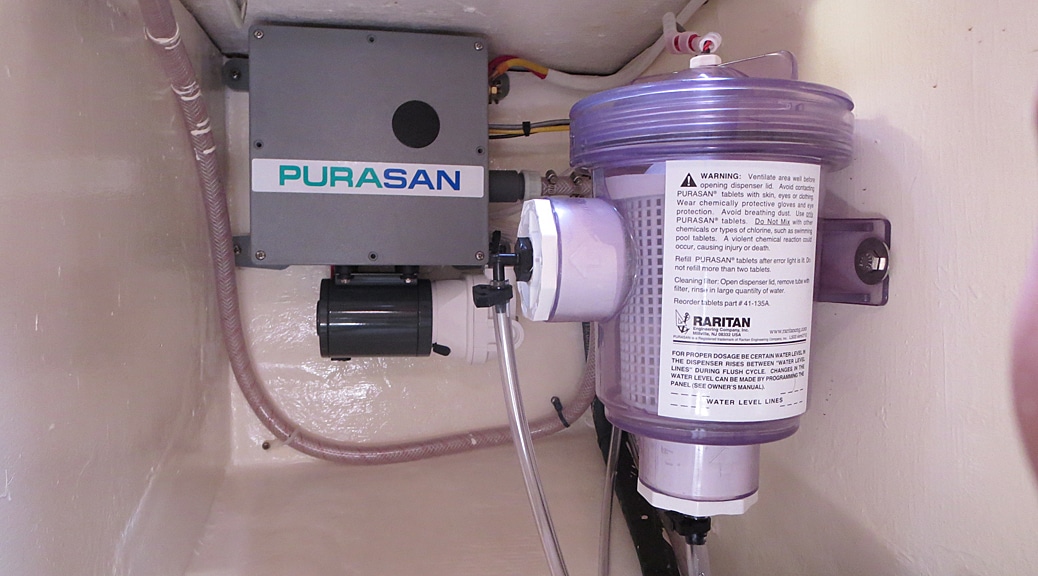
Install a sewage treatment system and new electric toilets– An obvious source of sewage smell is carrying around the sewage with you everywhere you go until you come to a working pump out station. We had no choice but to do this on our previous boat because of its smaller size and because we never went offshore beyond the three-mile limit. Our current boat has enough room for a sewage treatment system which obviates the need to carry the sewage around with you except when in a “no discharge zone”. We opted to install the Purasan EX system from Raritan Engineering which is Coast Guard approved and chemically treats the sewage to be far cleaner than the typical on-land municipal sewage treatment plant. In that respect, it’s better for the environment than using a holding tank since the pumped out sewage simply goes right to the municipal sewage treatment plant. This was simpler to install than you might think (shown below) and has worked extremely well. We also had a decision to make about new toilets. There were three basic choices – manual, electric, vacuum. On our previous boat, I twice had to disassemble parts of the sewage system to free a clog. Nasty, Nasty, Nasty. Oh and one more thing – Nasty! Needless to say, our goal was to minimize the chances of a clog as much as possible. We liked the idea of an electric toilet since the first thing it does in the flush cycle is grind up the waste before it even enters the discharge hose. In addition, the configuration of the grinders creates a pumping effect which forces the ground-up waste through the hose. Because of that, a smaller diameter discharge hose can be used which has the added benefit of having a smaller surface area for odors to emanate from if the hose has any permeability to it. The Purasan unit receives the ground-up toilet discharge and then subjects it to two additional grinding cycles of its own along with the chemical treatment. All that happens before the sewage is forced through a long length of hose to a vented loop prior to going overboard. We’ve had this in operation for over three years now without any clogs.
Improve the air ventilation to/from the holding tank– With our holding tank remaining empty most of the time now, it is no longer a contributing source of smell. However, when it is used (in no discharge zones) it is critical that there is enough air flow from its vent to the outside to mitigate any smell from the tank on the inside of the boat. The existing vent hose and connectors on our holding tank were wholly inadequate for this. We doubled the size of the vent hose and replaced the connectors at both ends with much larger ones to greatly increase the air flow.
Below is a picture essay showing how all these improvements were done for the forward head. The aft head was actually a lot easier to do because the hose runs were not as complicated and the work space under the floor was easier to negotiate.
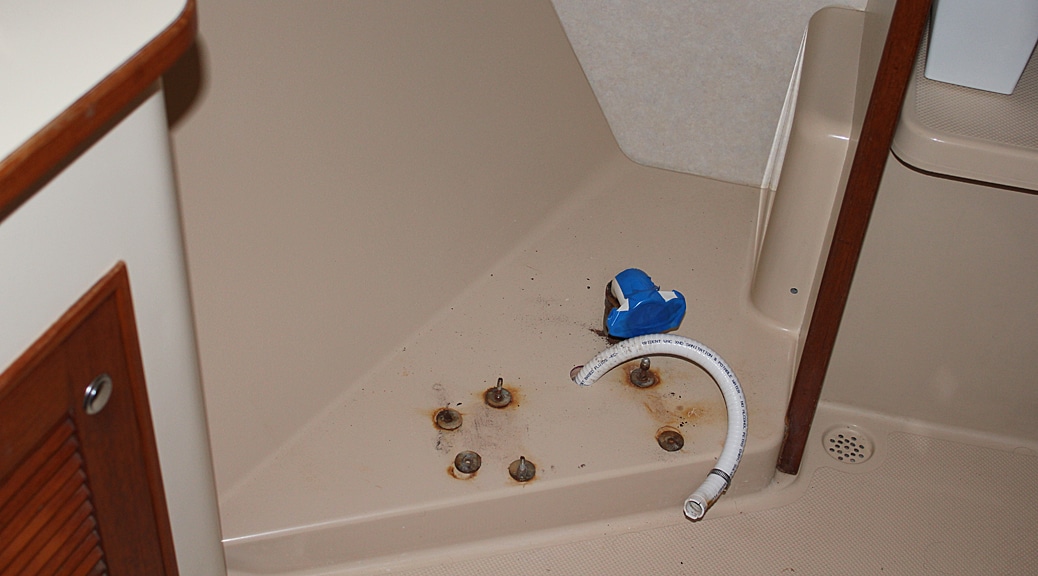
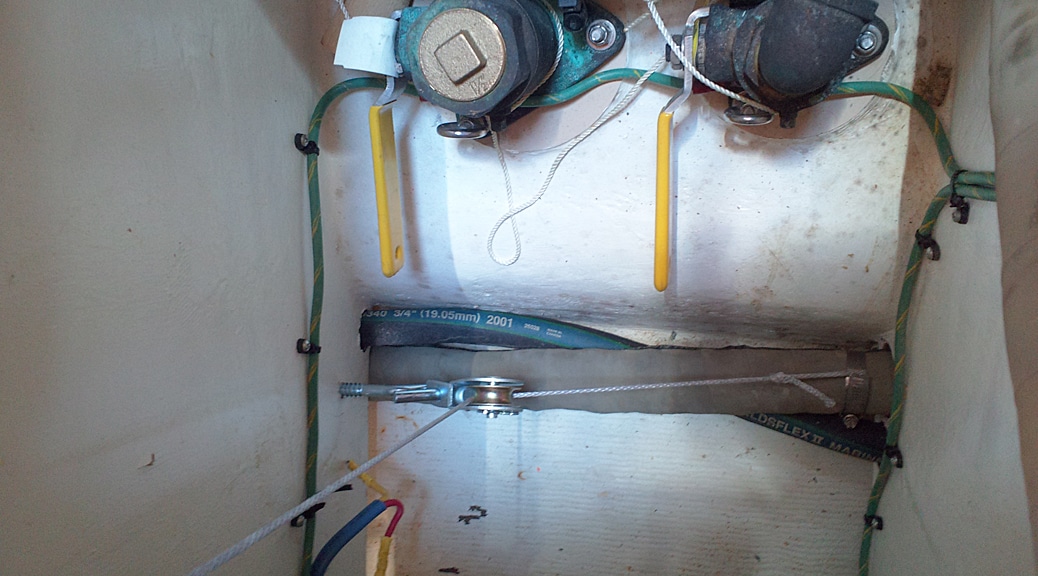
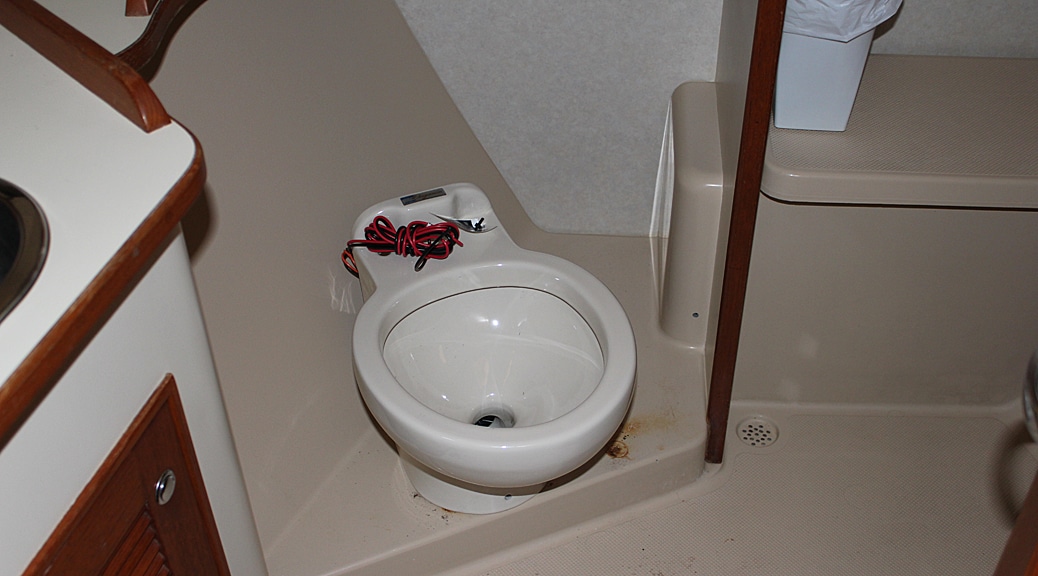
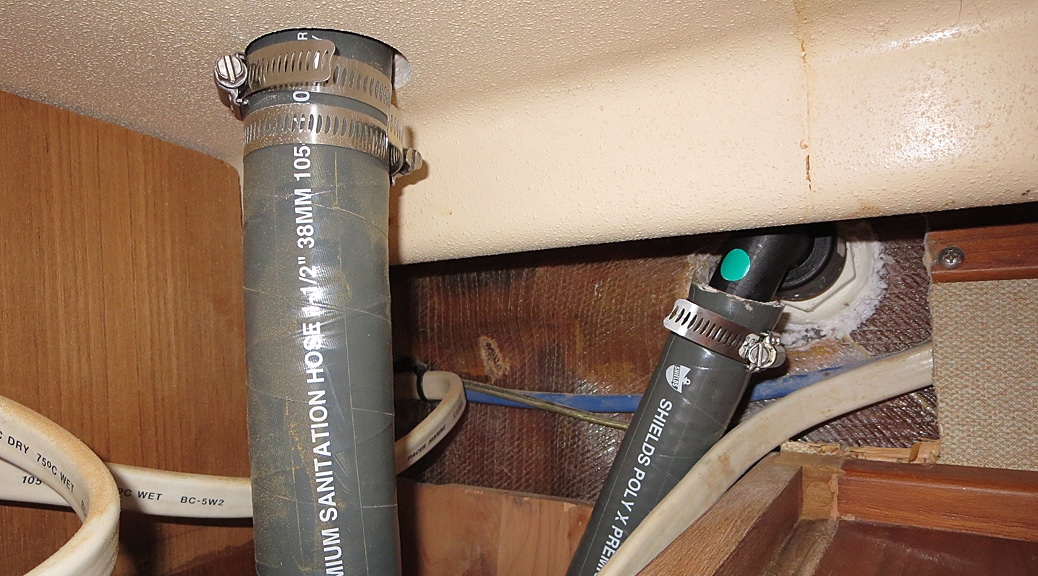
The forward head compartment of the Island Packet 420 with the old manual toilet removed. You can see rust stains from the old bolts. The white hose is the original seawater supply for flushing. The larger hose in the back with the blue taped fitting is the original waste hose. The new toilet had a more compact footprint so these holes had to be glassed over and new gelcoat applied..This is the compartment under the floor in front of the hanging locker in the master stateroom. The left side of the picture is the aft end of the compartment and the top of the picture is the port side. The seacock on the left is for the toilet discharge overboard in the original setup. The seacock on the right is for the discharge from the macerator pump used in the original setup to empty the holding tank overboard. The main point here is the grey hose in the center of the picture at the bottom of the compartment. This is the original toilet discharge hose from the forward head. In order to pass through two under-floor bulkheads from the toilet into this compartment, the hose is routed through a PVC pipe (which you can’t see) that terminates at bottom of the bulkhead on the right. It was impossible for me to get enough leverage with just my arm strength to pull the old hose out through this PVC conduit since it was so tight fitting. Therefore, I built myself a “jig” with good mechanical advantage to pull the hose out. The jig starts with a pulley I temporarily added on the left (aft) bulkhead. Through this pulley, I fed a line which attaches to the old grey hose via a hose clamp. Once enough “pull” was put on this line from above, the hose would inch its way out of the PVC conduit. After about 7 inches or so of movement, I had to loosen the hose clamp and slide it further down the hose to be able to move it the next 7 inches.
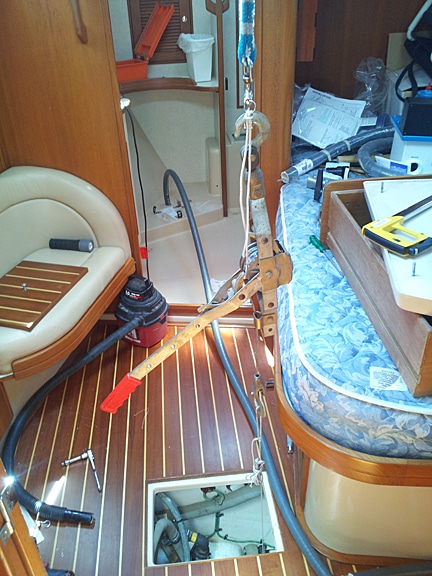
Now you may be wondering how I applied enough “pull” to the line attached to the old hose that comes around the pulley and goes up. It turns out that directly above this compartment is a deck hatch. Very conveniently, our spinnaker halyard (blue/white line at the top of the picture) had a fair lead from the masthead straight down though this hatch to just above the waste hose compartment. While I could have used a deck winch to apply the pull, I opted instead to attach a “come-a-long” between the halyard and the line attached to the hose so I could watch the progress as I applied the pull using the come-a-long. At the same time I was pulling out the old hose, I was also feeding in the new PolyX sanitation hose. This was easily accomplished by joining the toilet-end of the old hose to one end of the new hose before the old hose disappeared down under the floor where the toilet sat. As I pulled out the old hose, the new hose fed through right behind it. This was a long and tedious process, but it worked and nothing broke.
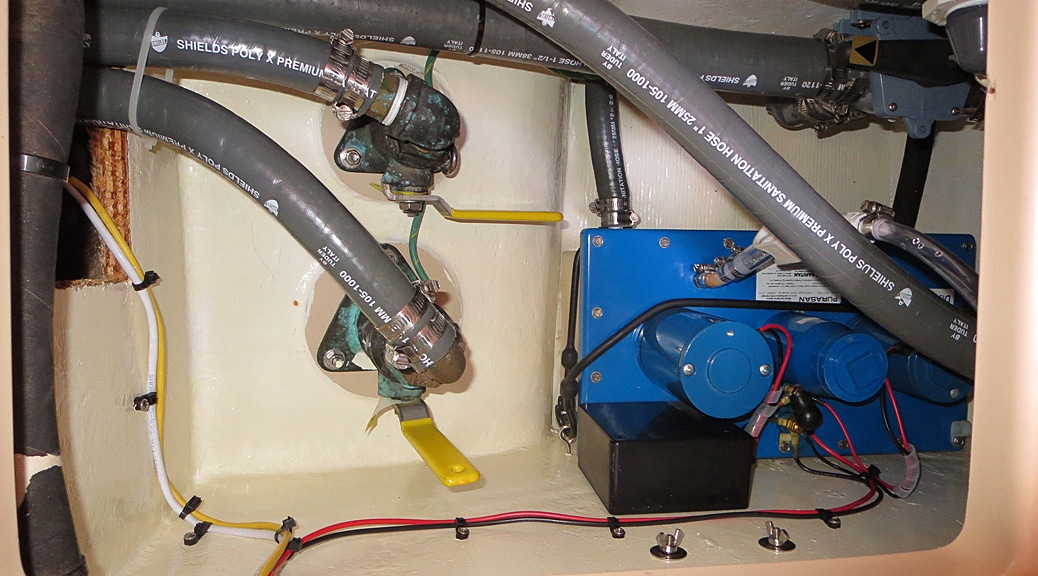
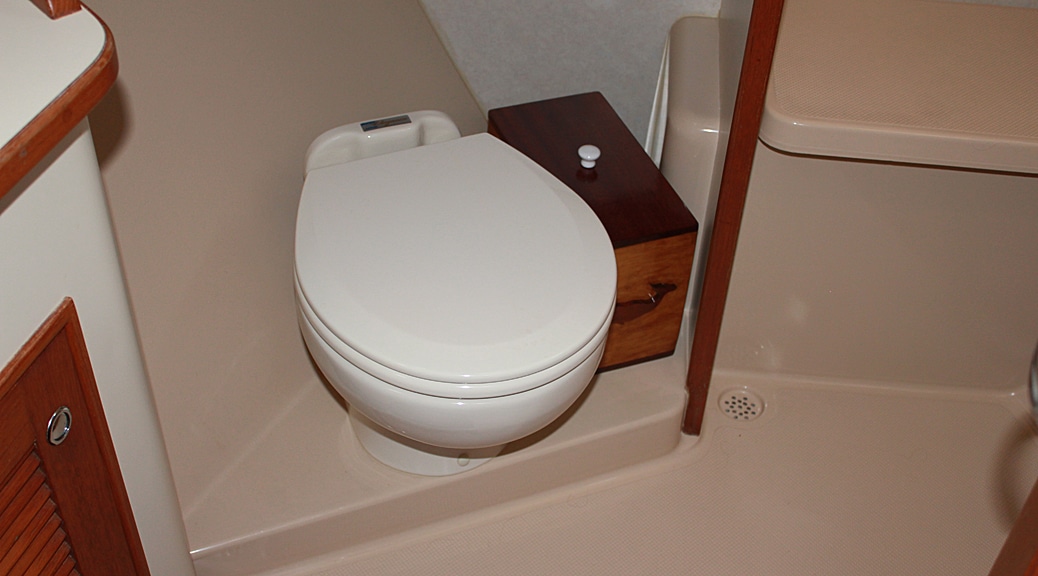
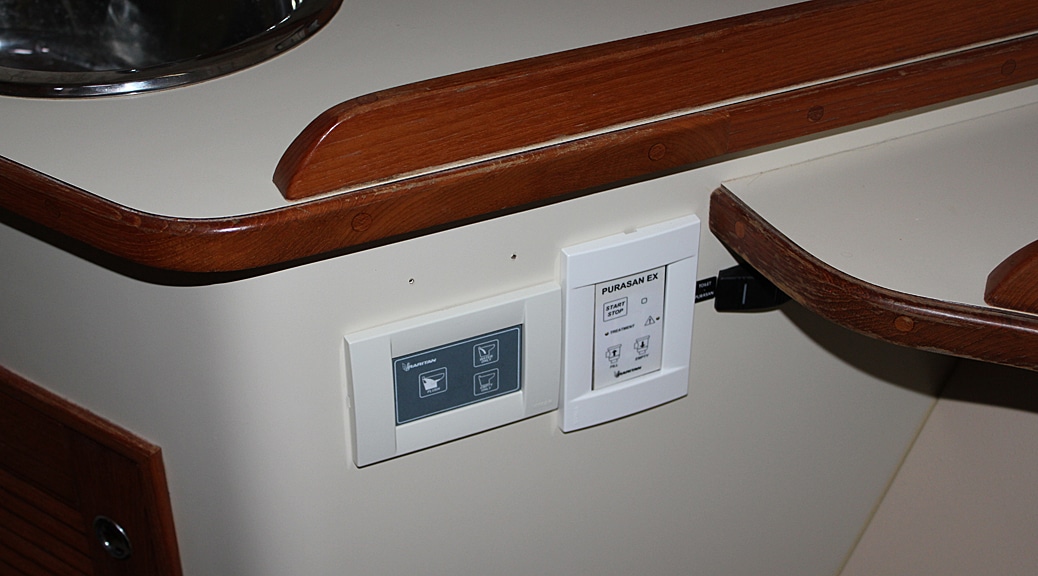
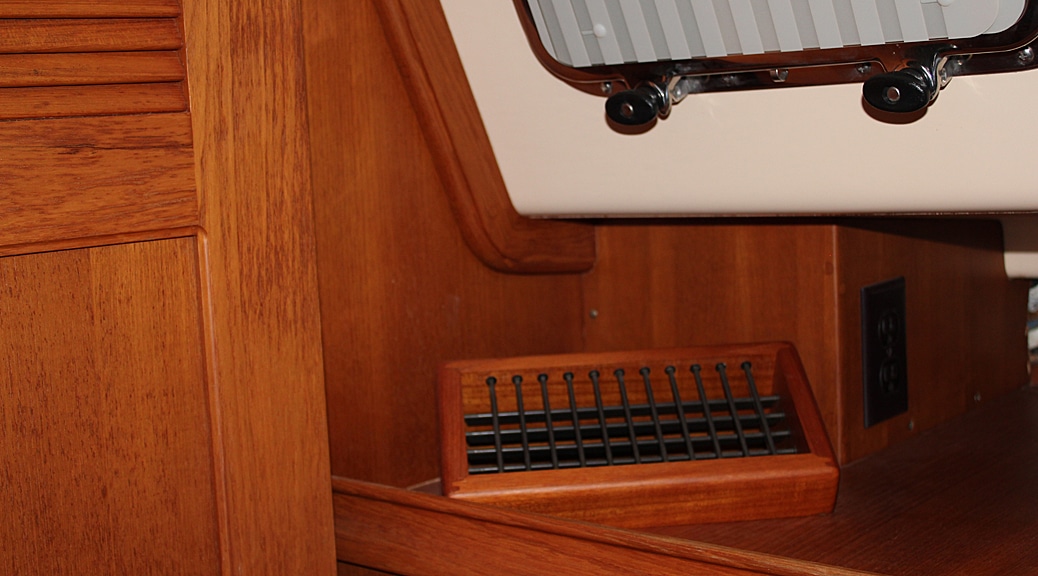
Here is that same compartment, viewed from a different angle (bottom of the picture is the aft end and left is the port side) all cleaned up with the new hoses and the Purasan treatment unit installed. In the center of this picture at the bottom of the compartment you can see the new hose coming from the toilet and going into the bottom left of the blue treatment unit. This new arrangement also includes two diverter valves. The first one, which is visible in the upper right of the picture, sends the contents of the holding tank to either the deck pump-out fitting or to the macerator for pumping overboard. The second diverter valve (not shown) sends the output of the treatment tank either overboard or to the holding tank (for when in no-discharge zones). The treatment tank is held to the aft bulkhead in the compartment with bungee cords.Just aft of the under-floor compartment containing the treatment tank shown earlier, is another compartment which I used for mounting the Purasan control box and chemical dispenser. The view in this picture is toward the port side of the boat. Only two small holes had to be drilled through the bulkhead to the other compartment for wires and a small hose. The chemical dispenser is mounted just enough to the center of the compartment so that the lid can be easily be screwed off to add new chlorination tablets.After all the hoses were replaced and the Purasan installed, I test fit the new electric toilet. Unfortunately, the most optimum place for it required closing up all of the holes associated with the original toilet and drilling new ones. There turned out to be a fair amount of gelcoat work to cover the old holes and deal with the visible rust stains.The finished installation of the new electric toilet with all the gelcoat work done.Next to the toilet are the control panels for both the toilet and the Purasan. The Purasan can be wired to the toilet control so as to automatically activate every time the toilet is flushed. However, I found this to be inconvenient when initially calibrating the Purasan and testing everything out. Therefore, I wired in a switch, shown at the right of the Purasan panel that, when toggled, allows the toilet and Purasan to be operated independently for troubleshooting and/or calibration purposes.Getting at the vent hose coming from the holding tank was more of a challenge than I thought. The vent hose comes up from the holding tank through the hanging locker on the port side of the stateroom, and exits the boat just above the locker. The top of the locker is shown in the bottom right of the picture. There is a teak enclosure on the top of the locker (behind the HVAC duct in the picture) that hides both the holding tank vent hose and the pump-out hose. This enclosure also creates a surface for an AC outlet. The enclosure had to be removed to replace the vent hose and hull fitting. This was the only carpentry work required for the whole project.With the teak enclosure removed, I now had good access to the outboard ends of both hoses. Connecting the new pump-out hose was straightforward. The vent hose was trickier because I needed to drill a larger hole in the hull and attach a new right-angle fitting for the larger diameter hose. These larger components necessitated cutting out a little bit of the teak molding and wall panel forward of the enclosure to get everything to fit (including tools). It was well worth it though as the tank is now far better ventilated.

One Response
Well done in all respects! A job worth doing is worth doing right. May you have years of “smooth sailing” and trouble free use with your new heads!!!!