
When we bought C Ghost, it did not have a watermaker installed. We knew we wanted to have one eventually, but decided to wait until our cruising plans dictated we’d really need one. With our intent to cruise to the Bahamas later this winter and potentially be at anchor for extended periods and away from a fresh water supply, the time had come.
There were four main factors in our watermaker decision – where to install it, power draw, capacity (how much water can it make), and cost. We knew well in advance this was going to be an expensive addition and had planned for it when we bought the boat. We also knew we wanted it to run off 12V DC so we wouldn’t need to run the generator or engine every time we needed to make water. Ideally, its power draw should be low enough so it could run off the energy from our solar panels on sunny days (for more on that topic, see Solar Panels). Having been at anchor for up to 10 days on previous cruises, we had a good idea of our consumption habits, both in “miserly’ mode and “luxury” mode. Our goal was to find a watermaker that could operate within our solar energy budget and in the process, produce enough fresh water to get us as close to “luxury” mode as possible. The last piece of the puzzle was finding a watermaker that could fit on the boat without intruding on our living space or consuming an inordinate amount of precious storage space. As it turns out, this last requirement was the hardest part of the project.
After a lot of research, it became clear we’d need a “modular” style system to meet the space requirement. Self-contained watermaker systems, while much easier and idiot-proof to install, were just too big for any available space we had. Modular units allow the individual components of the system to be spread around different parts of the boat making much more efficient use of space, but also complicating the plumbing and overall installation.
After careful measurements of the space we made available, we decided on the Spectra Ventura 200T system. This unit produces 8.3 gallons/hour with an energy draw of 10 amps @ 12V DC. In theory, running this system for 2 – 3 hours a day (daily use is actually recommended for this technology) would keep us in “luxury” mode. The Ventura 200T comes as four major components and several smaller parts. Here are pictures of the spaces we made available on the boat to install these components:
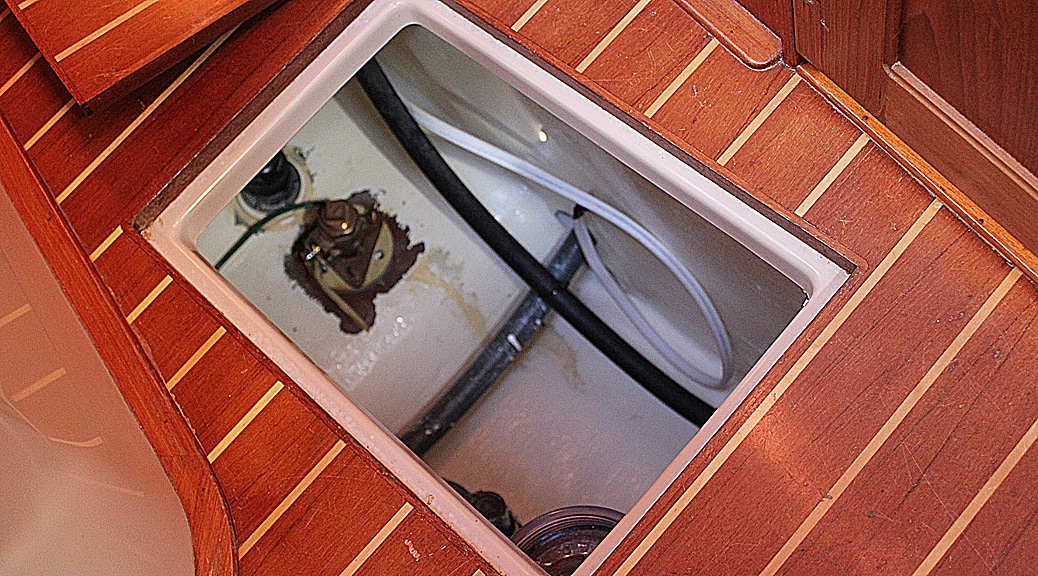
The last time the boat was out of the water, we re-purposed an existing thru-hull to be the intake for a future watermaker. On the Island Packet 420, there are two thru-hulls in the underfloor compartment at the foot of the master berth. One is for the depth sounder and the other for a paddlewheel style speedo. We replaced the dedicated depth sounder unit with a combo depth sounder/speedo unit (converting it to a NMEA2000 sensor at the same time). That freed up the thru-hull previously dedicated to the speedo. We replaced the speedo’s large plastic thru-hull with a smaller diameter bronze thru-hull and backing block (some epoxy work was needed to make the original hole smaller).
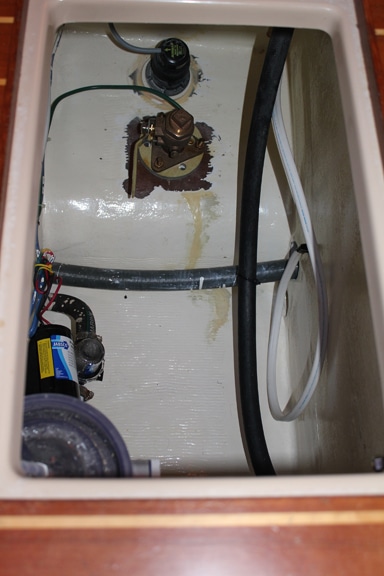
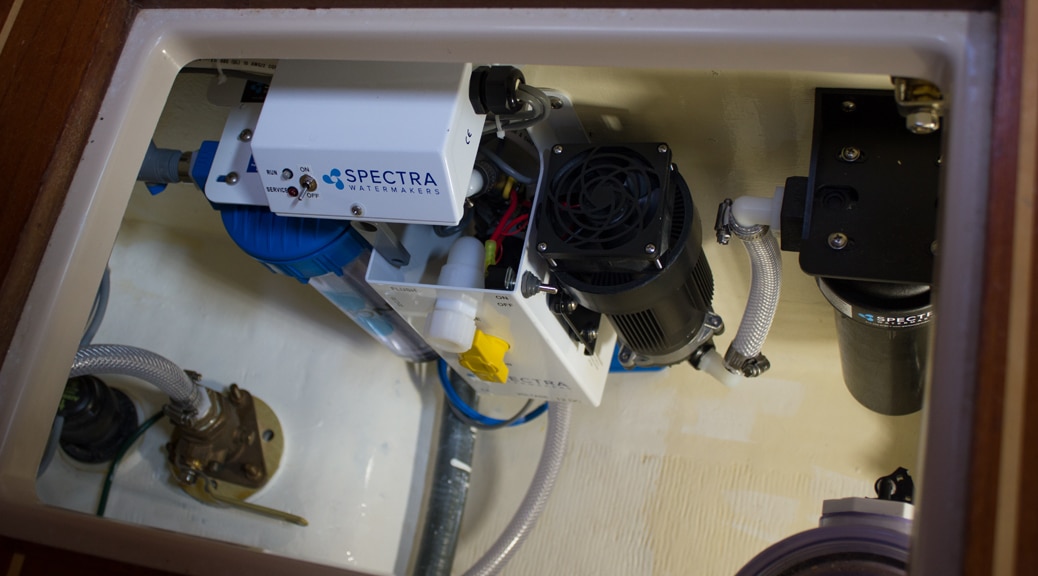
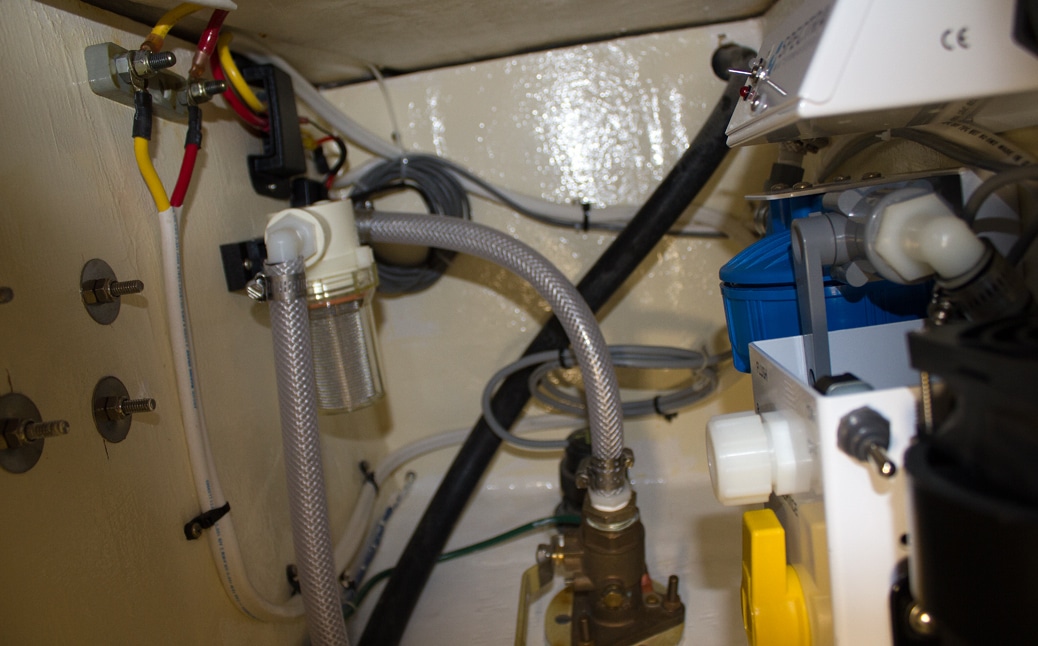
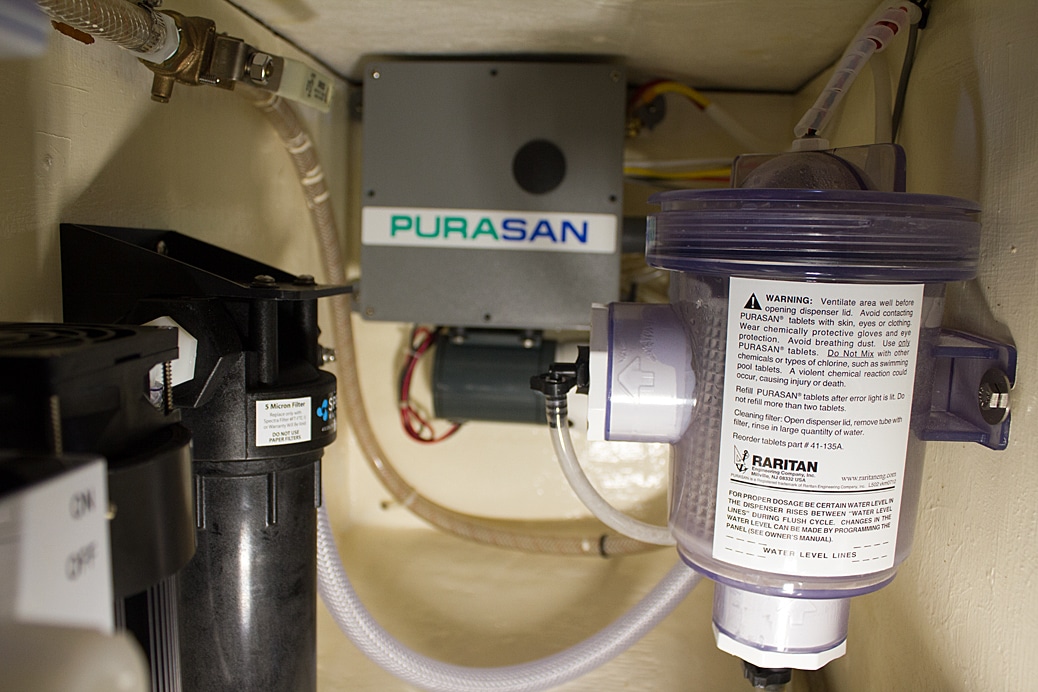
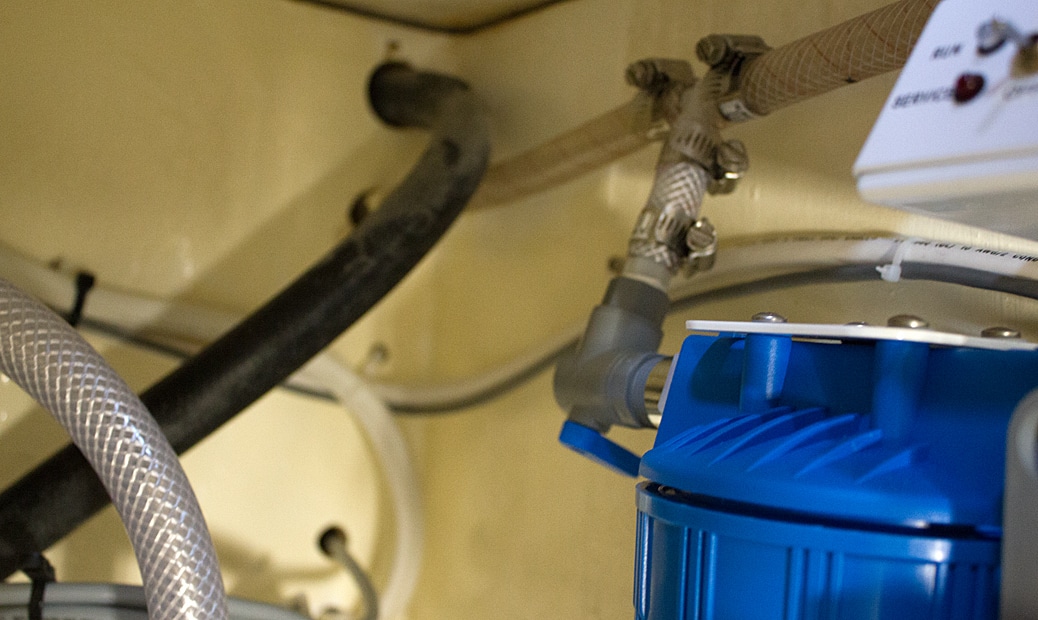
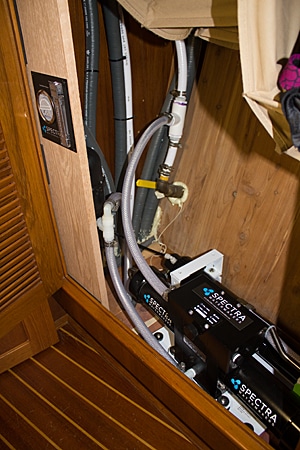
In that same compartment is where we mounted two of the four main watermaker components, the feed pump module and pre-filter, as well as a seawater strainer. Also shown is the optional Z-ion disinfectant unit used during the “flush” cycle. Here is how they fit:
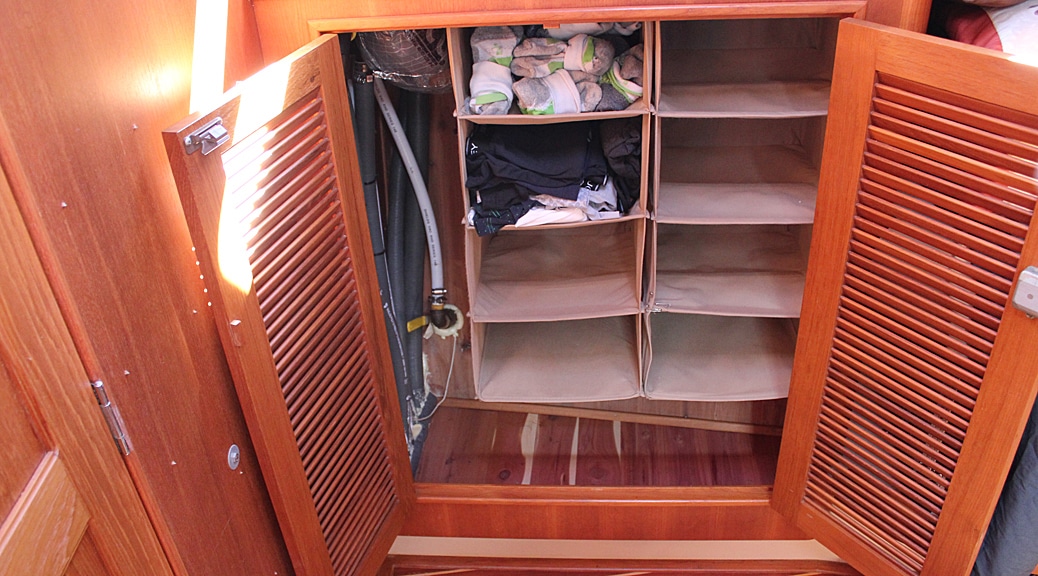
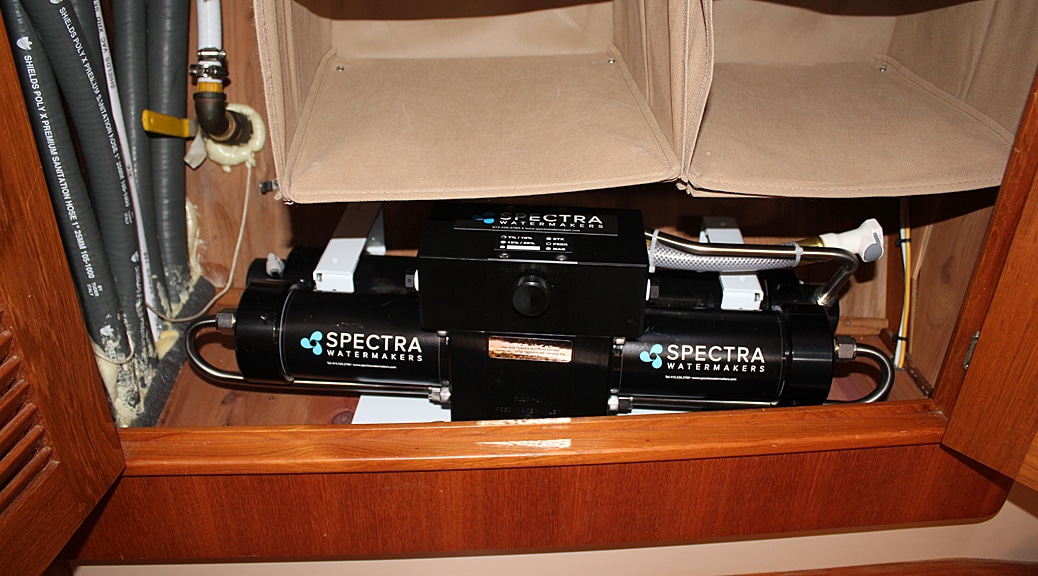
Next was the installation of the largest component of the Ventura 200T system, the high pressure pump/membrane. The space we chose for this was the floor of the hanging locker in the master stateroom. We had previously converted this locker into a closet with soft shelves for clothes as you can see below:
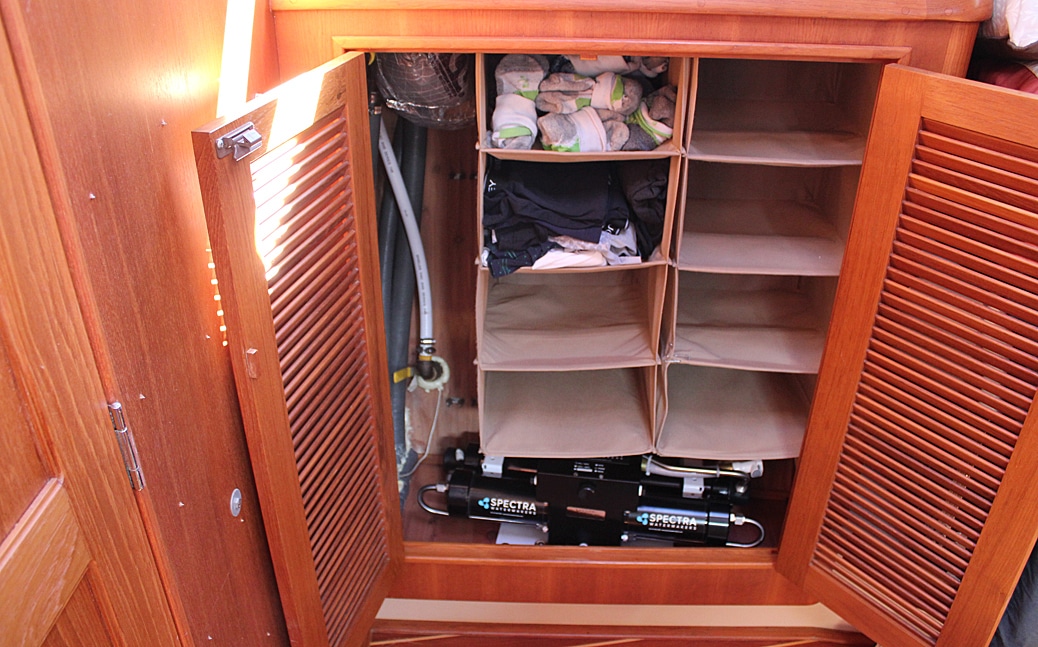
Locating the pump/membrane unit in this locker allowed us to “tee” into the existing shower drain thru-hull, which is also in this locker, with a very short hose run for the brine discharge.
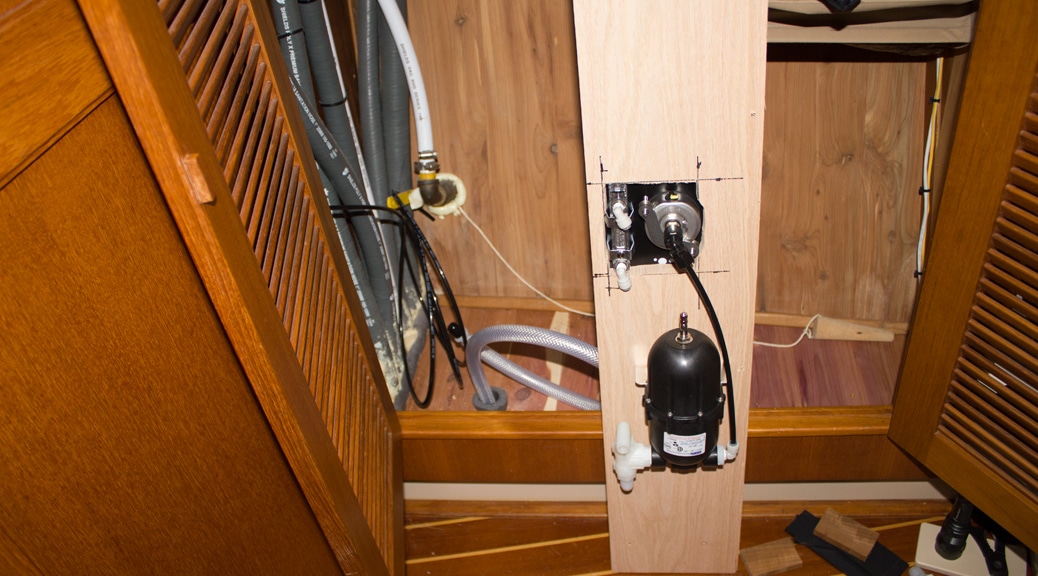
The last main component is the accumulator tank, pressure gauge, and flow meter combo. These gauges are mechanical, not electronic, and must have water lines plumbed to them to operate. Wanting to make these waterlines as short as possible, we decided to mount the gauges and accumulator tank on a wood “panel” fashioned to fit just inside the locker door on the aft side:
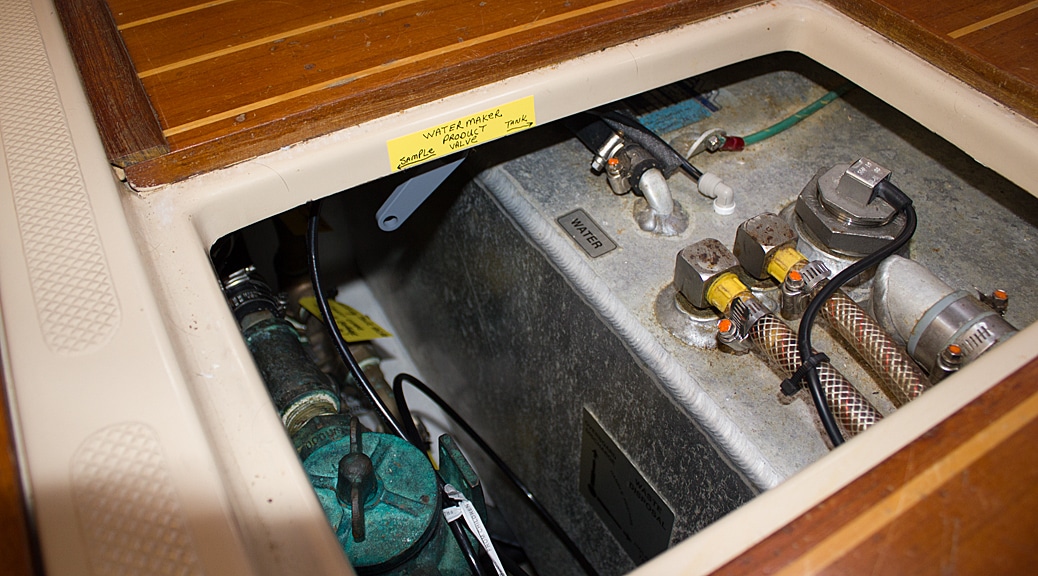
Lastly, the product water needed to make its way to the water tank. This was harder than we thought it would be. The best part about using the spaces we did for the installation was that we had very short hose runs, particularly for the high pressure lines. However, the only accessible part of the top of the water tank was much further aft in the boat, under the floor panel in the main salon next to the nav station. Also, operation of the watermaker necessitated running the first few minutes of product water into a separate area/container in order to test it before diverting it into the tank. We wanted to make sure this part of the operation wouldn’t result in water possibly spilling where we didn’t want it. The answer was to run the product hose aft from the master hanging locker behind the port side settee and then make a left turn to the center of the boat toward the tank fill inlet. Our original thought was to tee into the tank inlet hose in order to get the watermaker product into the water tank. That was going to be difficult however, since the existing tank inlet hose was much larger than the watermaker output hose, and the clearance under the floor where the tank inlet hose enters the tank was minimal. We decided instead to “tap” a new hole in the top of the tank and screw in one of the supplied fittings from Spectra to connect to the tank. This was a little scary, but turned out great. It also allowed for the placement of the product water diverter valve just under the floor in that same area so that the “sample” water at the start of each cycle could drain straight into the bilge:
Since we were in our marina, and the water still has a lot of sediment from hurricane Irma, we tested the watermaker with an “artificial ocean” (made with measured fresh water and sea salt) in a five-gallon bucket. We had to tighten a few hose clamps and re-tape one fitting with more Teflon tape, but all eventually worked very well with no leaks. The product water tasted good with well-below the recommended salinity. At least with the artificial ocean, the production rate and power consumption were as advertised. We’ll report again on how it works in actual daily use once we get to the Bahamas.
5 Responses
Tom- A great well thought out job.
Thanks! This one was a fun challenge. It had that mystique of not knowing precisely how it would all come together once I got started. Adapt as you go…
Tom & Paula: Great Job. Having witnessed the installation on our recent visit was very nice to see your clever workmanship with this clean water project. We imagine both Spectra and Island Packet must be quite pleased to learn of your handiwork on their products. Sparkling–Clean–Fresh Water–C-Ghost has it all. Luv, M & D “C”.
Thanks Dad! We can’t wait to use it for real.
WOW! yoy have been busy. I am not sure what happened. I have been checking your blog but many of your entries just showed up recently. Happy New Year!